Nowadays, Microsoft’s earnings are touching the heights of success. Microsoft is hitting the global economy and enhancing user experience. For every business and personal use, it is everyone’s first preference. In this guide, we will discuss adding Microsoft Planner to SharePoint site. But first, we will discuss what Microsoft Planner and SharePoint are.
There is a planning tool on the Microsoft Office 365 Platform called Microsoft Planner. The Planner gives users and groups access to a diversity of features on the Office 365 platform, including developing plans, creating and delegating work, sharing files, engaging with other individuals, and getting progress reports. Microsoft has added the terrific ability to quickly link Microsoft Planner to SharePoint list as a Plan and regarding web elements.
Conversely, SharePoint enables you to build websites, pages, and platforms for teams, divisions, programs, and other things. SharePoint pages can be created and used for array cooperation, data management, and coordinating needs. Additionally, there is a myth that Microsoft cannot add Microsoft Planner to SharePoint site, but it’s wrong. This article will go through the solution to the misconception of how to connect Microsoft Planner to SharePoint and SharePoint Planner permissions.
Contents
The sole purpose of the SharePoint Planner web components is to make it simple for users to operate the Plans from within the SharePoint Pages. To do this, you must first associate Planner with SharePoint sites. You can start using the web part after adding it to a page and choosing the Plan you want to connect to. Have a glance at how to add MS Planner to SharePoint using the Planner web part:
Step:1 Sign in/Log in to the Microsoft 365 account and visit the SharePoint Start Page.
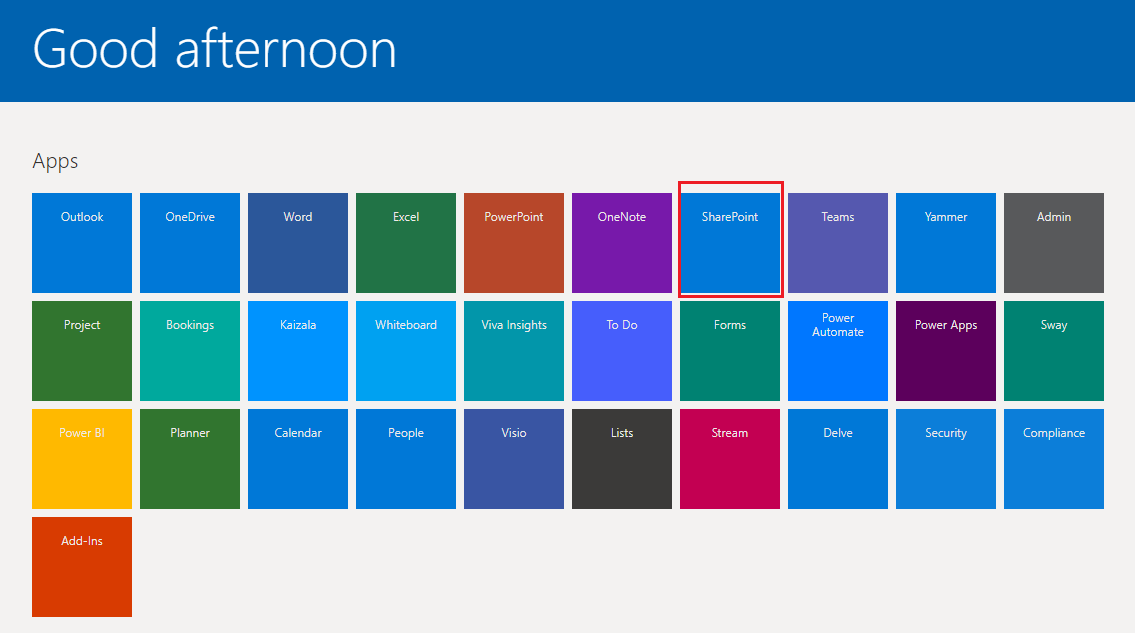
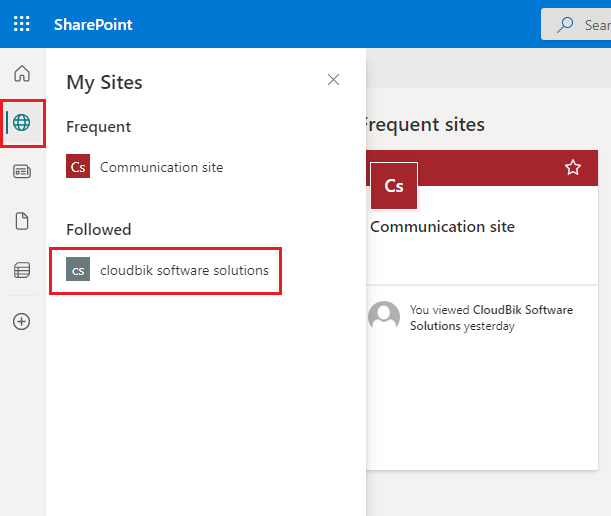
Step:2 Select the SharePoint site and webpage that you want to use, or you can create a new site if you don’t have one.
Note: You will need the Team site to use the Planner feature. In the communication site, the Planner feature did not work.
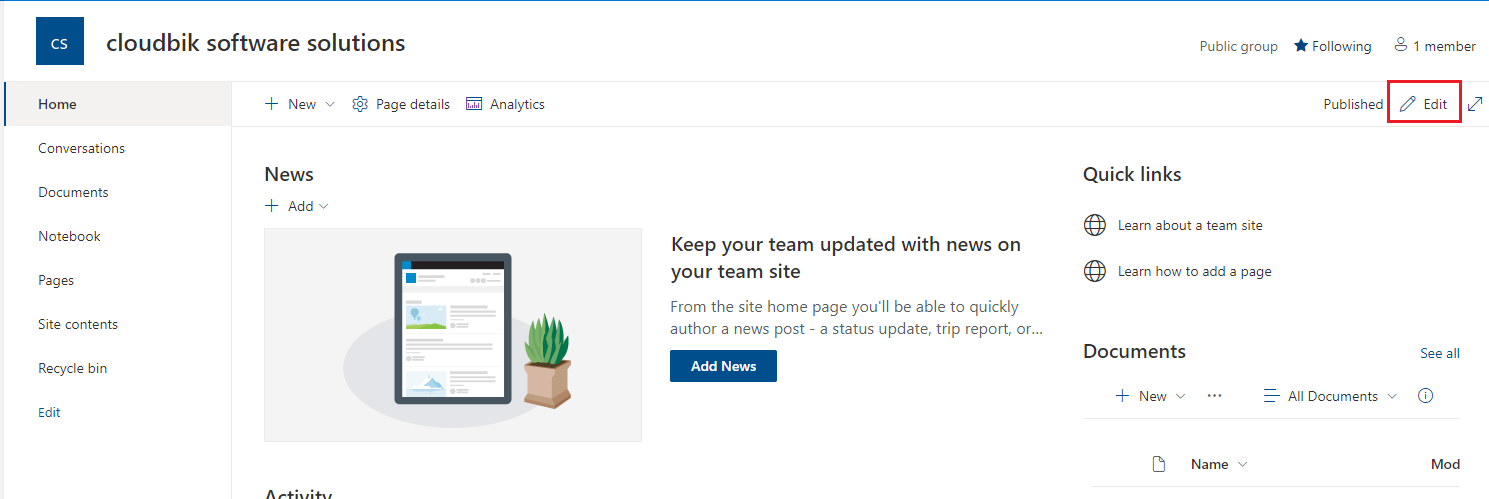
Step:3 By selecting the Edit option in the page’s upper right corner, you can switch the page into edit mode.
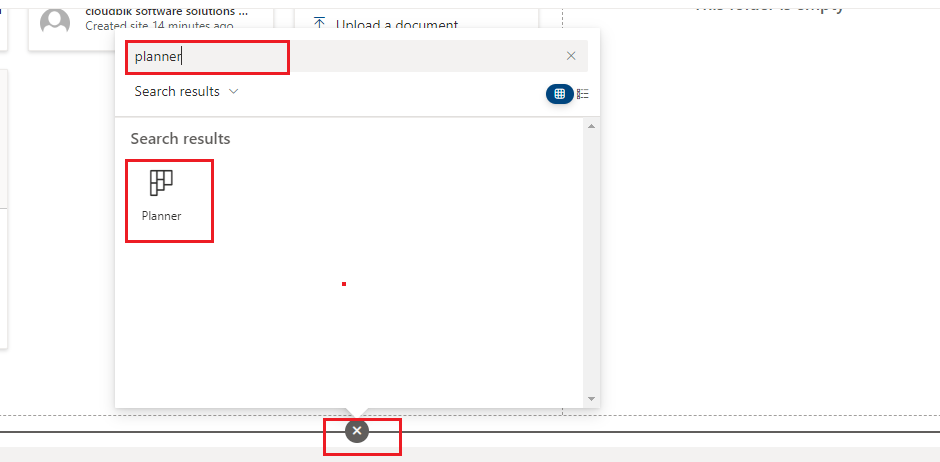
Step:4 Choose Click the + symbol near the end of a section, then type “Planner” into the window that pops up, just like you would when adding any other web element. Select the Planner web component.
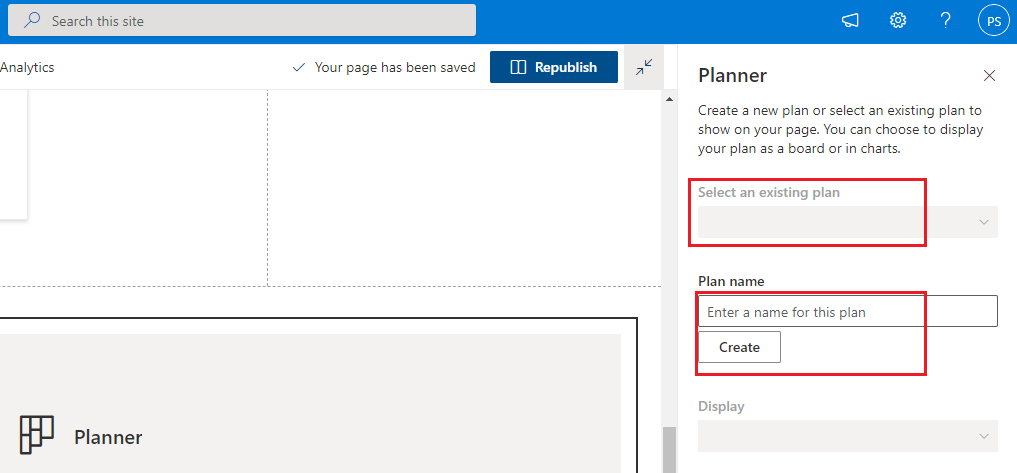
Step:5 The options panel on the right allows you to choose a current plan or develop a new one.
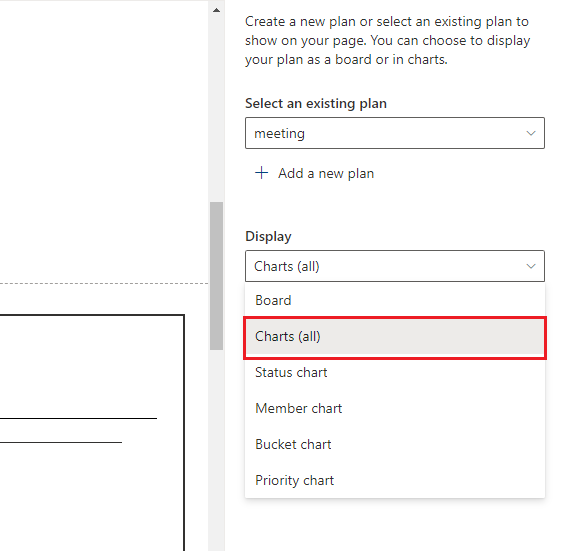
Step:6 Select the preferred Display view. The Planner web section with your chosen features is now visible. Here, we have selected the Charts (all).
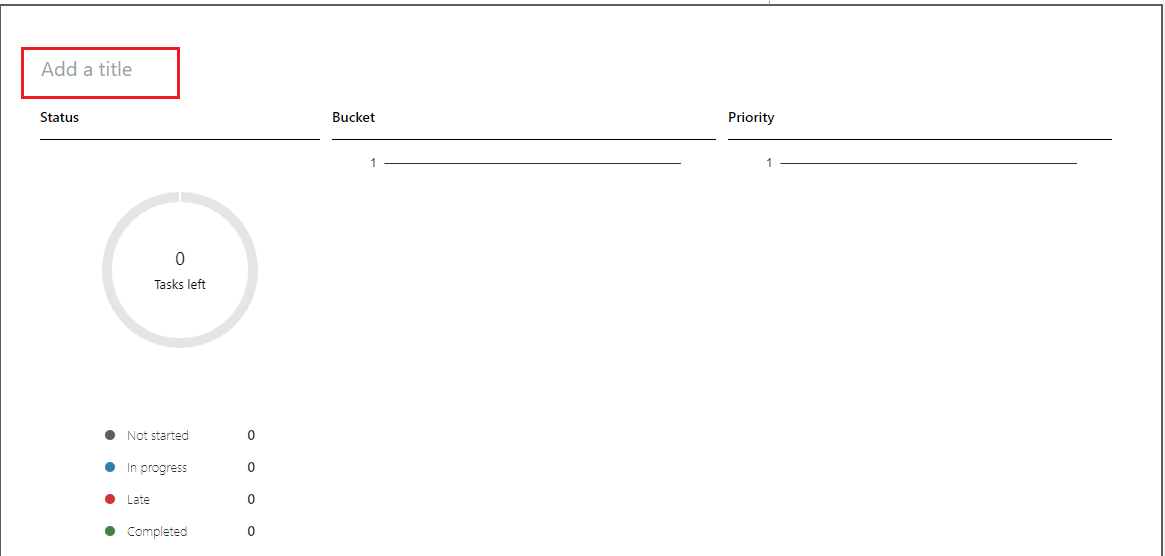
Step:7 Give the newly inserted web section on the page an appropriate title.
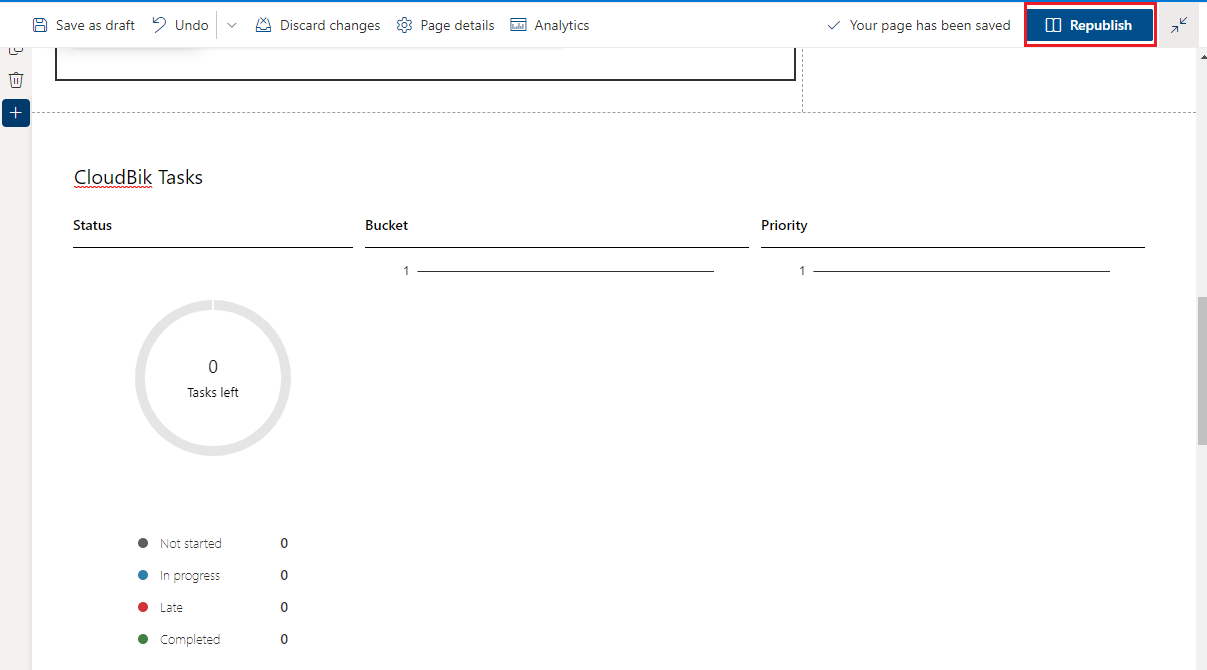
Step:8 Choose the Republish button to store all changes and make the page online.
You can experiment with various display choices depending on your needs.
To enhance user experience, Microsoft has introduced Charts View in Planner. You may easily gather and access essential information with SharePoint web components, including shared documents and corporate media. This experience is enhanced by the new Planner web component. It enables you to add project details to pages and news articles. You can select the Planner Board or Charts view to be displayed on your homepage based on the project information you consider is most significant to your team.
Additionally, it acts as a SharePoint Planner calendar that enables users and organizations to schedule their tasks. Users can find solutions using the Charts tool in Microsoft Planner to some of the queries team leaders or managers regularly ask.
Conclusion
Microsoft has enabled users to enhance their experience and explore the diversity of new features introduced by Microsoft. Under the article, we have explored adding Microsoft Planner to SharePoint. Microsoft truly outdid itself with this magnificent functionality of the new Planner Application, which offers a simple way to build new plans connected to an existing modern SPO site or use a current one.
Read More: How to Turn on and Enable Teams Together Mode in Microsoft?


