Sometime we are required to add multiple contacts in Microsoft Office 365. But manually adding contacts one by one to Office 365 may be time taking especially is the number is high. We can add contacts to Microsoft 365 in bulk by using Windows PowerShell. It will save us plenty of time. In this guide, we will teach you adding external contacts in Office 365 through Windows PowerShell and a CSV file.
Contents
Needs to Add Contacts to Microsoft 365
There may be particular requirement for which you need to add multiple contacts in Microsoft Office 365. It can be due to multiple requirements:
- When you have new team members who needs to be added to the company’s address book.
- If you’ve migrated to Exchange Online from a different email platform and need to bring your contacts with you.
- When you have a list of external contacts that you want to add to your Exchange Online account.
- If you need to add external members in the Microsoft 365 Groups.
Steps to Add Contacts to Microsoft 365
One can add multiple contacts through Office 365 Admin Center or Windows PowerShell. We will see both of the methods one by one.
Adding Multiple Contacts through Admin Center
Office 365 Admin Center allows us to add multiple contacts. But you can add only 40 contacts at a once using csv file. Below are the steps for the same.
- Visit microsoft.com and login with your admin credentials.
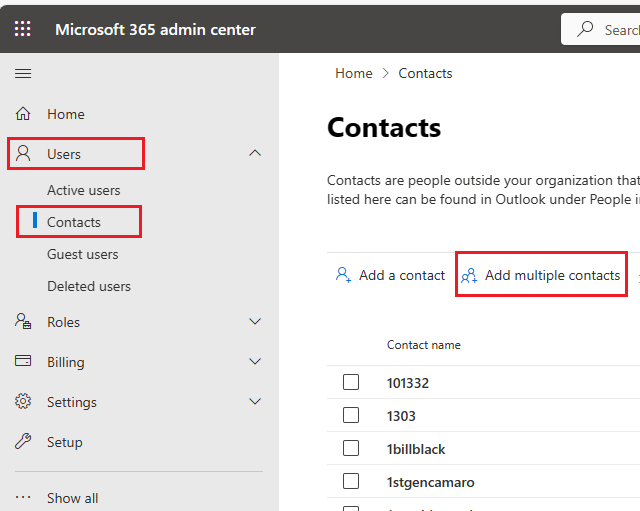
- Click on Users to expand Users field then click on contacts and then Add multiple contacts.
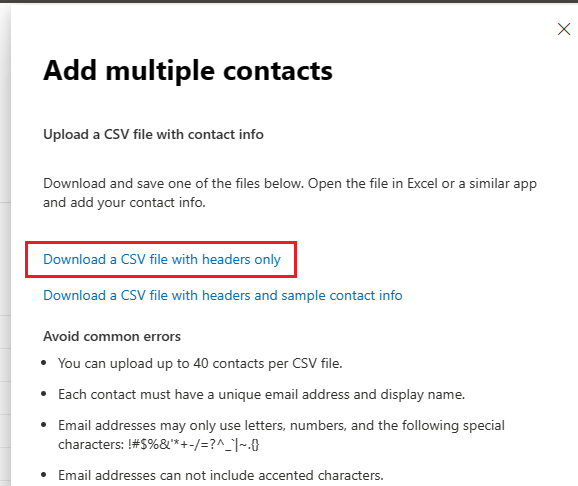
- A new window will open on the side for adding multiple contacts. You will now require to add CSV file containing contacts information. Click on Download a CSV with headers only to add your information in CSV file.
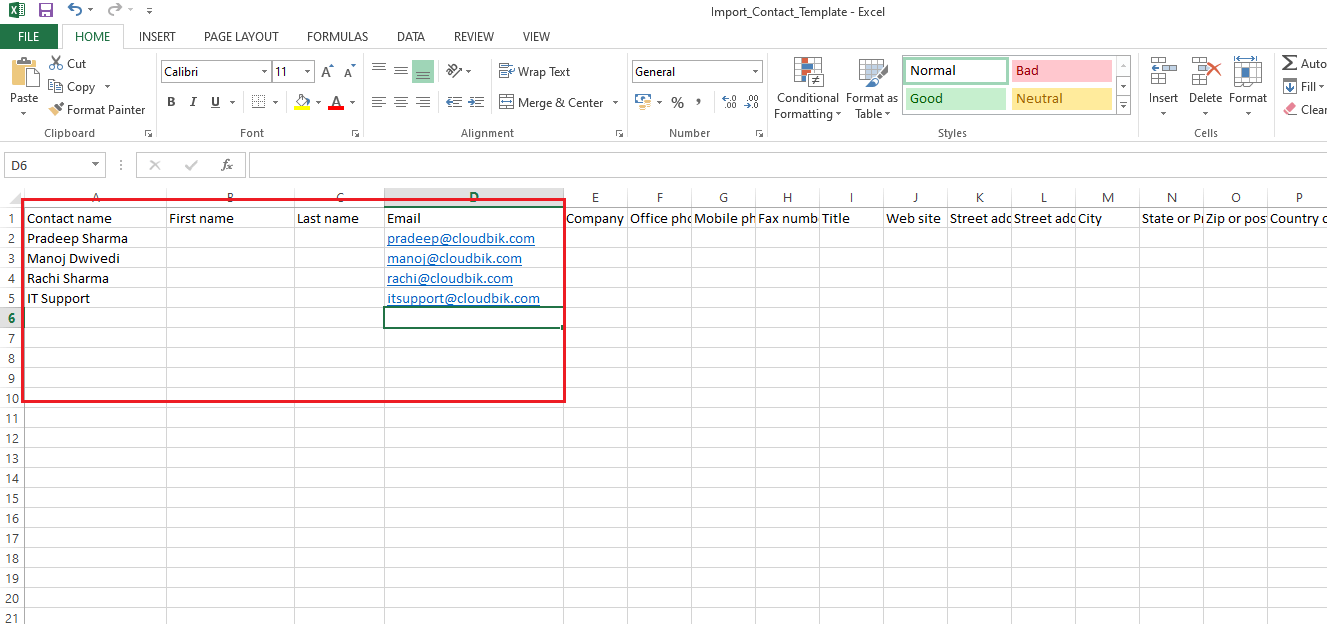
- Make changes in the CSV file as showing below. You can add just display name and email address These two are compulsory and others are optional.
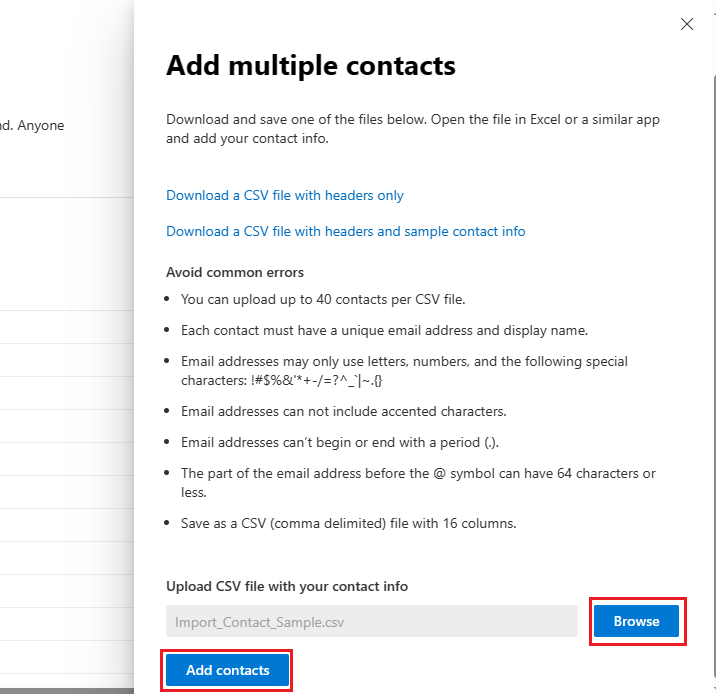
- Once done, click on the Browse button to add your csv file and then click on the Add Contacts.
It will add the contacts and you can see them in your contacts tab.
Add Multiple Contacts through Windows PowerShell
To add contacts through Exchange Online PowerShell, we will need to use new-MailContact command.
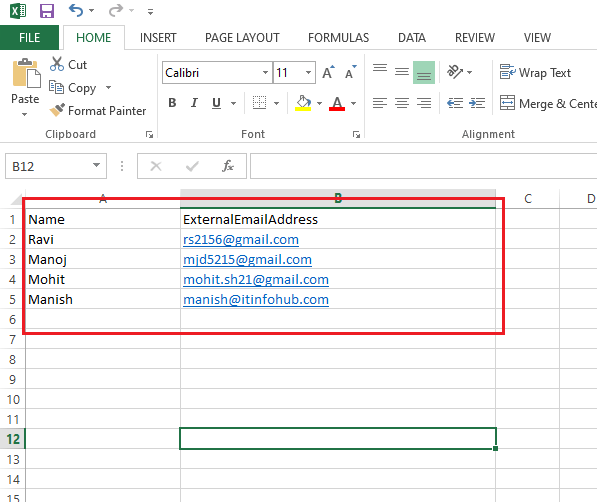
- First we need to prepare a CSV file containing your contacts informations. Name and ExternalEmailAddress information is must. However, you can add other details like FirstName, LastName, City, Phone, Company, Website, etc.
- Now open PowerShell as administrator and run the below command. After running the command provide your admin credentials when asked.
Connect-ExchangeOnline

Import-CSV <Filepath>  | foreach {

$Name=$_.Name

$ExternalEmailAddress=$_.ExternalEmailAddress

Write-Progress -Activity "Creating contact $ExternalEmailAddress in Office 365..."

New-MailContact –Name $Name –ExternalEmailAddress $ExternalEmailAddress | Out-Null

If($?)

{

Write-Host $ExternalEmailAddress Successfully created -ForegroundColor Green

}

Else

{

Write-Host $ExternalEmailAddress - Error occurred –ForegroundColor Red

}

}
- It will take some time and when the process completes, you can run the below command to view all the mail contacts.
Get-MailContact –Resultsize Unlimited | Select Name,ExternalEmailAddress,HiddenFromAddressListsEnabled
Using any of the two methods to add contacts to Microsoft 365, you can easily add contacts in bulk.
Conclusion:
This guide discusses two methods to add external contacts to Microsoft Office 365 in bulk. Through admin center you can add up to 40 contacts at a time but with PowerShell you can add upto 1 lakh contacts at a single time. You can choose which method you find suitable for you. I hope this article has provided you with valuable insight on adding contacts to Office 365 in bulk.


