Many users are asking how to migrate Gmail to Office 365 using IMAP migration Office 365. Gmail is a very popular email client, but Office 365 provides stability and advanced features, and a complete business solution, which is why Organizations are migrating Gmail to Office 365. You can read Why to Migrate to Office 365 to see the benefits of migrating to Office 365.
In this helpful guide, I will discuss multiple methods to migrate Gmail to Microsoft Office 365. This guide will cover all queries related to Migration to “Office 365 from Gmail”, “like exporting Gmail to exchange”, “Gmail to O365 migration”, “how to use IMAP migration in Office 365?”, “migrating email from Gmail to Office 365”, “migrate from Gmail to Office 365”, etc.
Multiple methods to Migrate Gmail to Office 365/Exchange Online
If 2-step verification is enabled for your Gmail account, then you need to create and use an App Password instead of a regular password and you must enable IMAP in Gmail. Check this helpful article to know how to create an app password and enable IMAP in Gmail. Let’s discuss multiple methods for migrating Gmail to Office 365.
Contents
1. Using Office 365 IMAP migration to migrate Gmail to Microsoft Office 365
In this method, we will discuss how to migrate Gmail to Office 365 using the IMAP migration option in Microsoft Office 365. Please follow the steps below to learn IMAP migration in Office 365 and do it yourself.
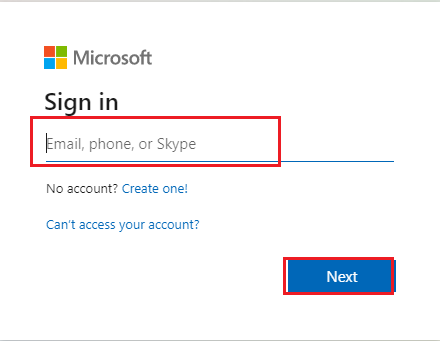
- Visit admin.microsoft.com and log in using your Office 365 credentials.
Note: You will need full admin access to perform the migration process
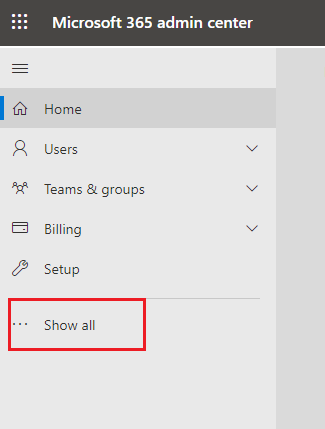
- Choose the Show all option in the left panel of the Admin Center.
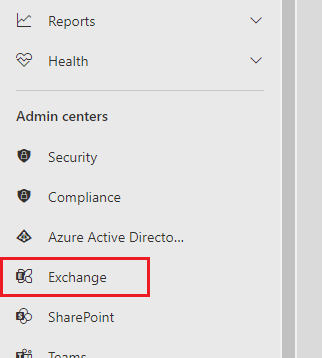
- Click on the Exchange, which will open a new tab displaying Exchange Admin Center.
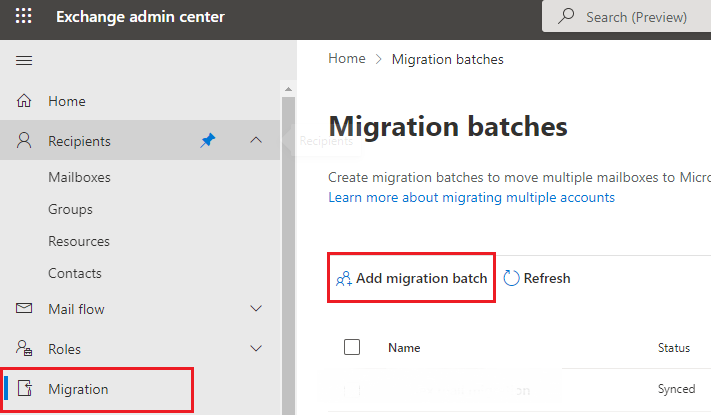
- Choose Migration and then Click on Add migration batch.
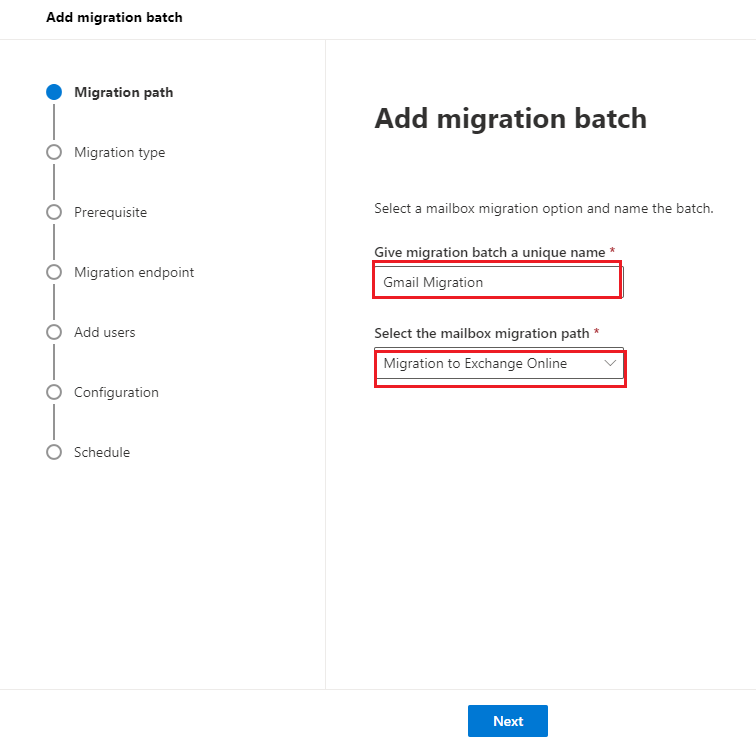
- Add migration batch window will open, choose a name and select Migration to Exchange Online for Migrating Gmail to Microsoft Office 365.
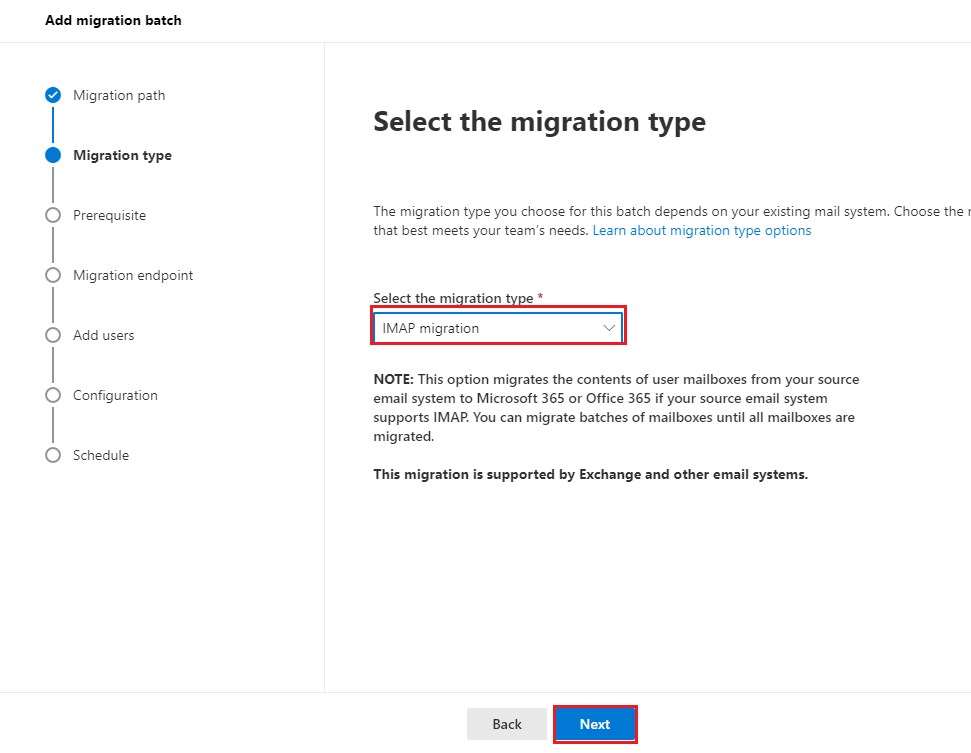
- Now select the migration type as IMAP migration and click next, and in the next window again, click on next.
Note: You must create users in the Office 365 account first to complete the Migration of Gmail to Microsoft Office 365. Click here to learn how to create a user mailbox in Office 365.
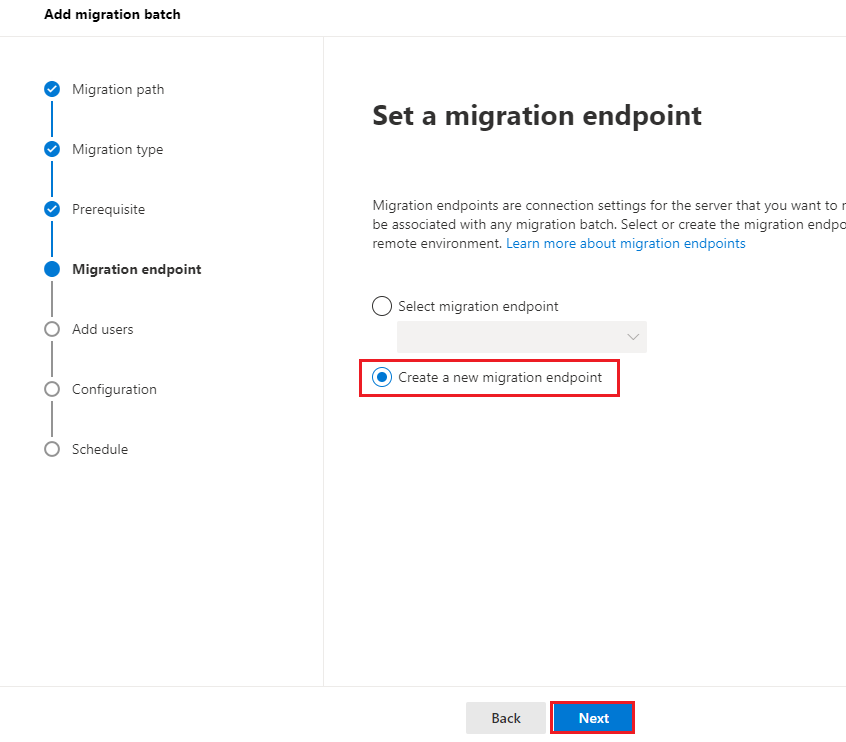
- Choose to create a new endpoint and click next.
- Put migration endpoint name, select maximum concurrent migrations and maximum concurrent Incremental syncs then click next.
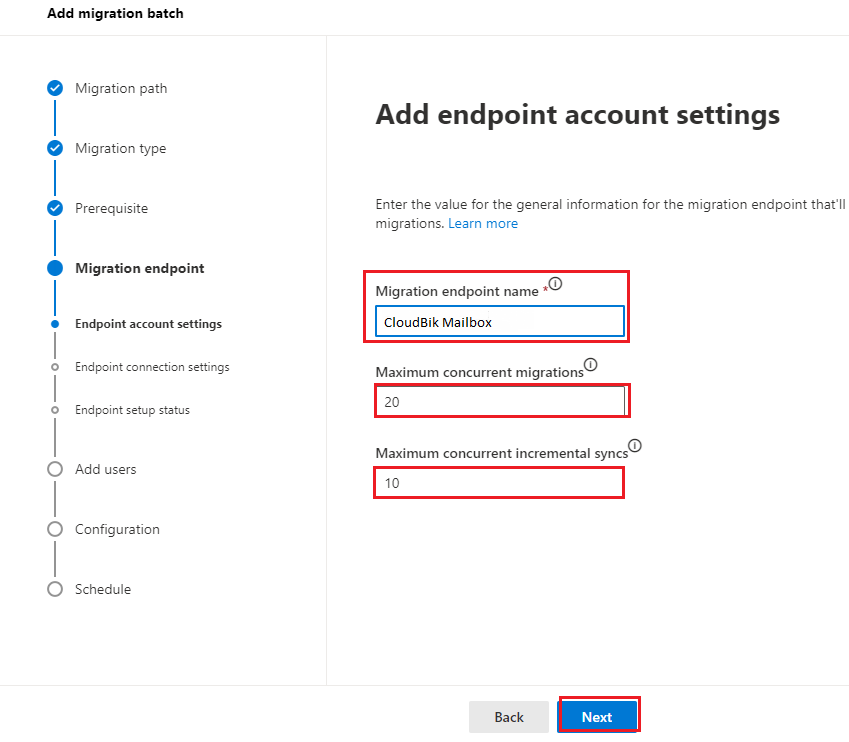
Note: Input concurrent migrations and incremental syncs as per requirement.
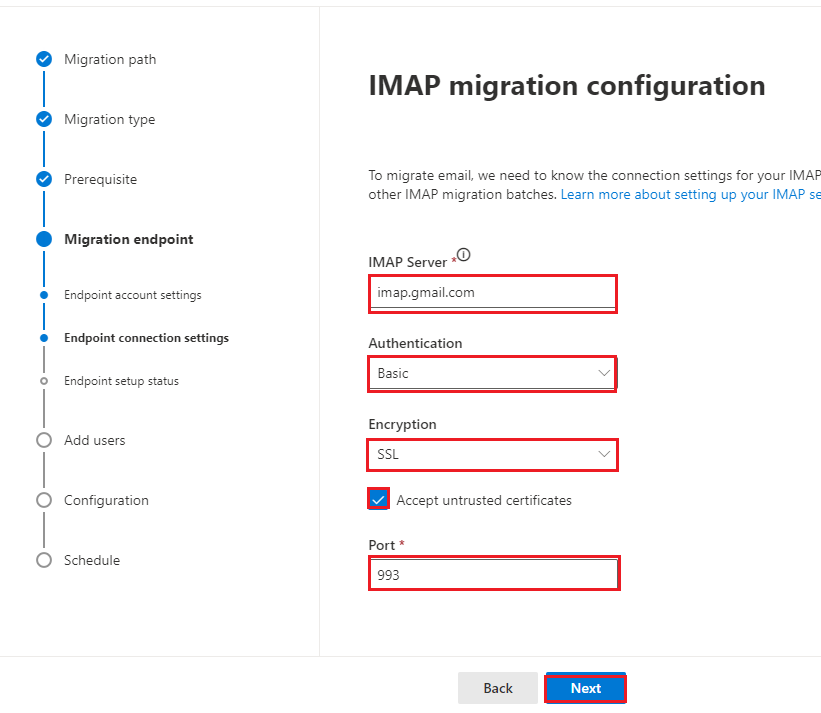
- In IMAP migration configuration, Put IMAP server, authentication, Encryption, and Port of Gmail IMAP and click next.
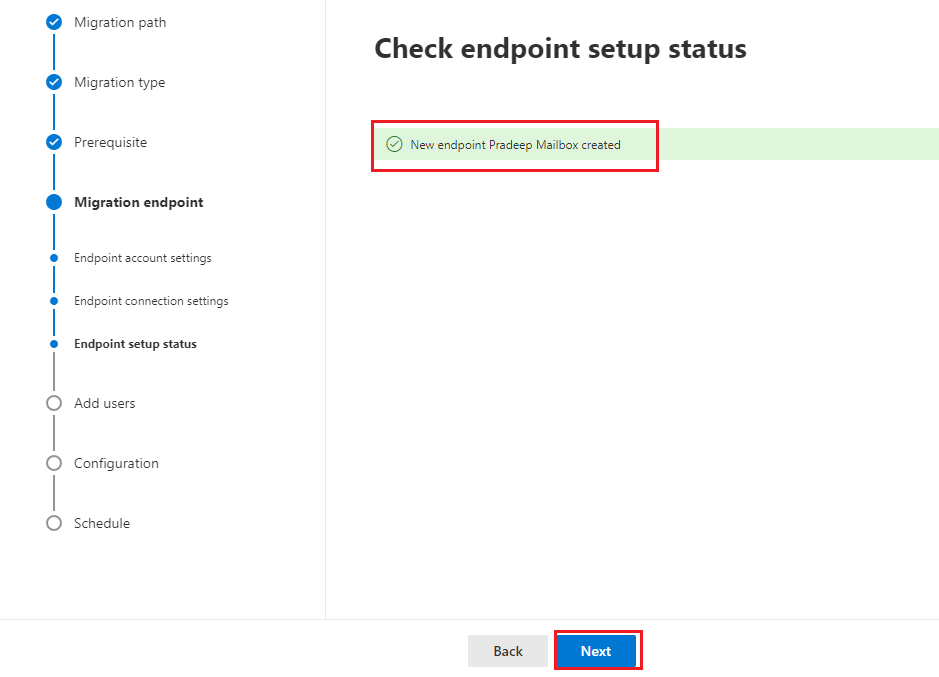
- It will show the status showing a new endpoint created. Click next to proceed further.
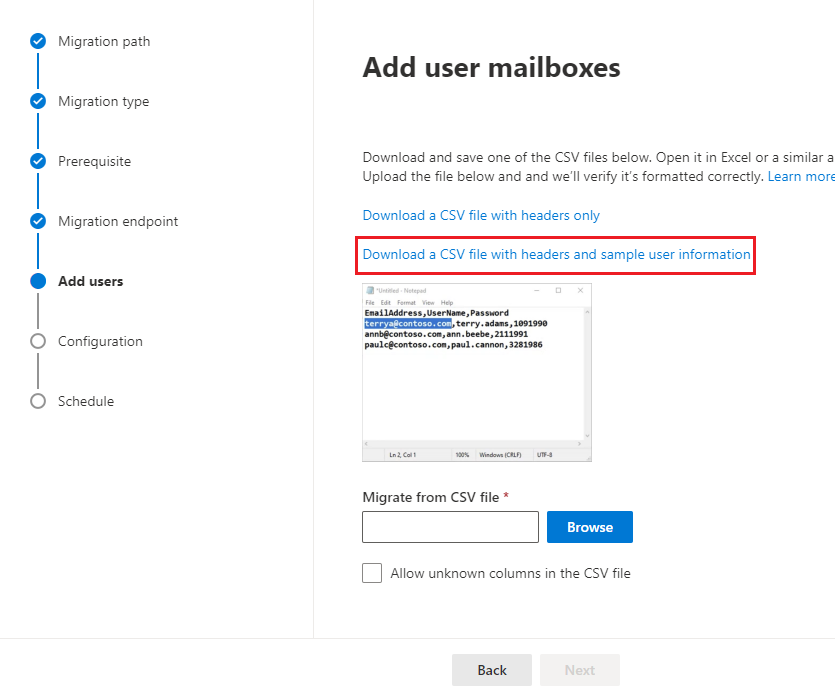
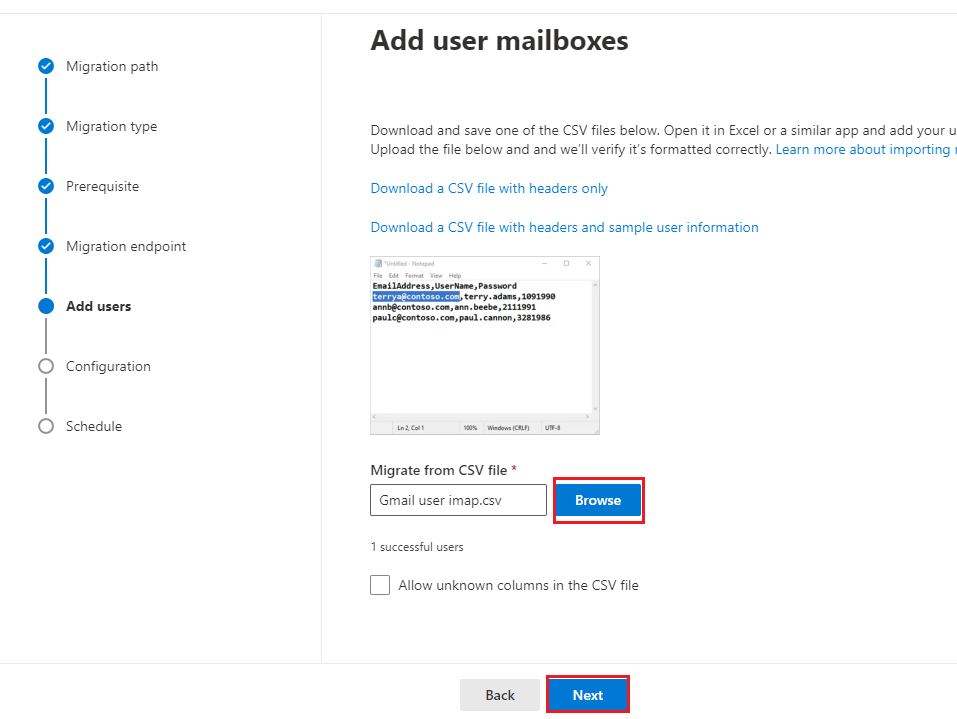
- Add user mailboxes window will open. Click on download a CSV file with headers and sample user information; it will download a CSV file.
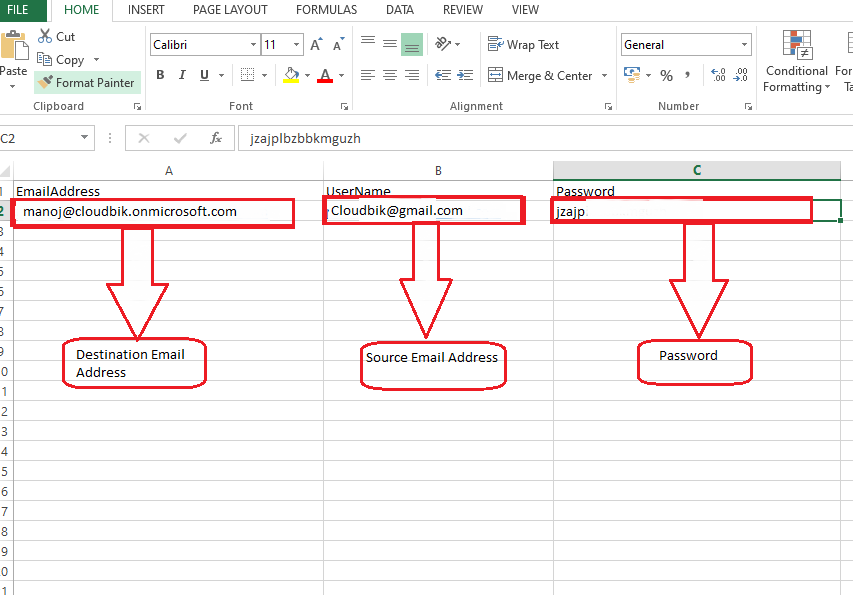
- Put the destination email address in the first column, i.e., Destination email address (user address in which you want to migrate your Gmail mailbox).
Enter Username in the second column, i.e., Source email address (email address of Gmail account).
Place Password in the third column.
Note: If two-step authentication is enabled in Gmail, create and put the app password; otherwise, enter the Gmail login password.
- Click on Browse, upload CSV file and click next.
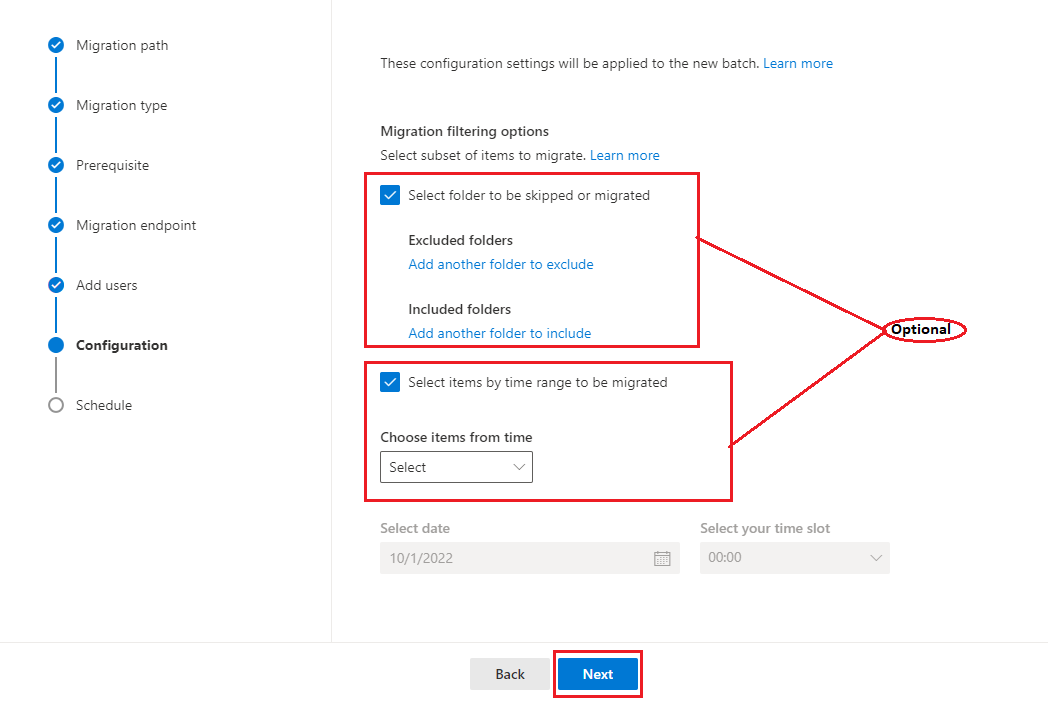
- If you want to skip some folders, click on select folders to be skipped or migrated; otherwise, leave it unchecked.
If you want to migrate particular timeframe items, choose select items by time range; otherwise, leave it as it is.
Click next to move further.
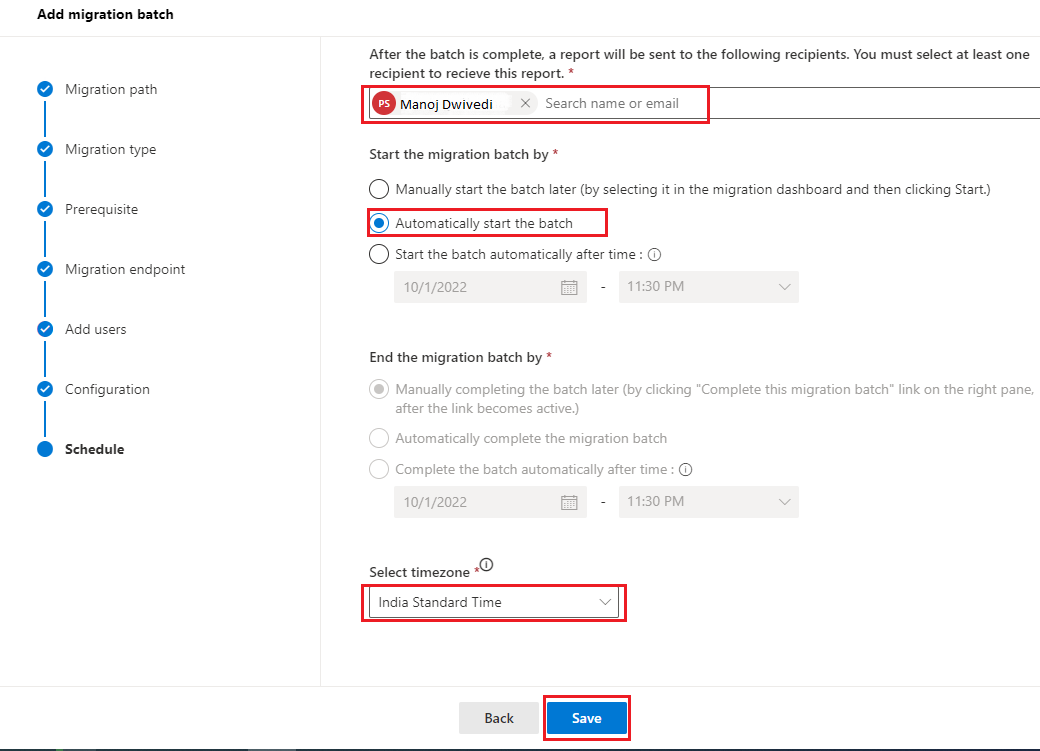
- In the next window, select the user account to send a report.
Choose automatically to start the batch immediately, you can choose manually or a particular time for starting the batch depending on your availability. Select your time zone and click save.
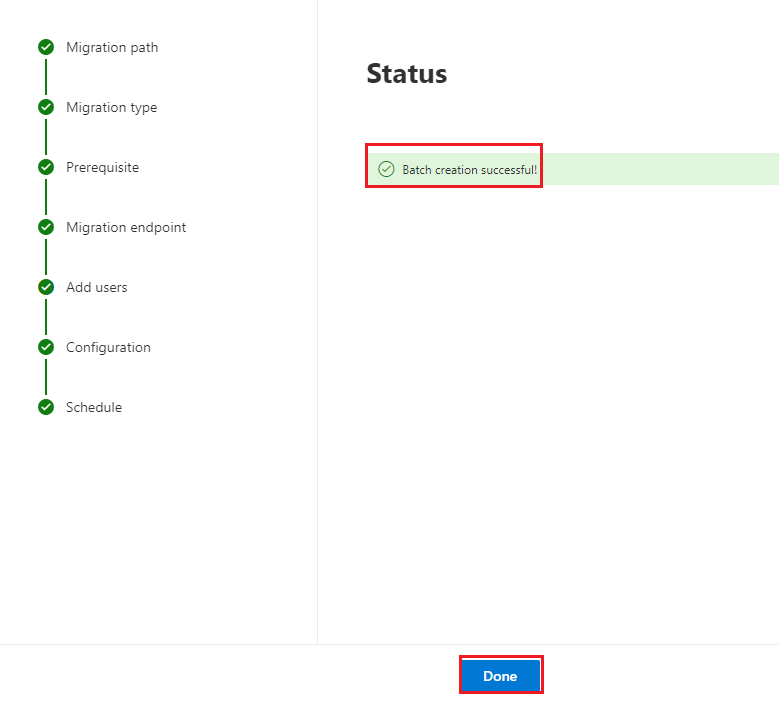
- It will create the batch and show you the status; click done.
- It will show status as syncing and will take around 5 mins to complete depending on your data size.
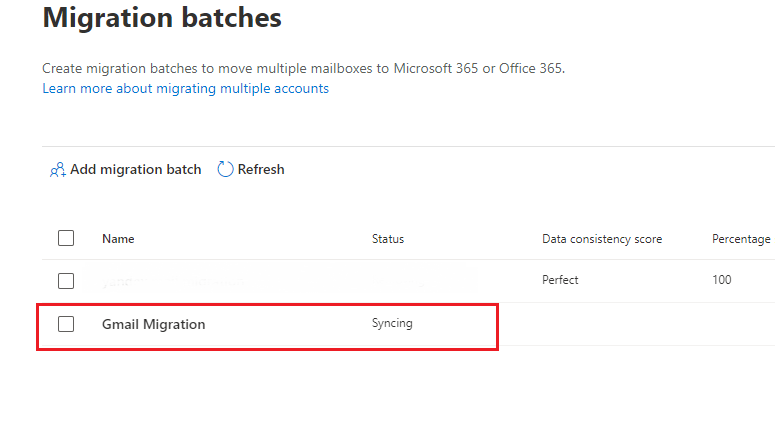
- After some time, refresh to check if syncing is completed or not. If completed, click on the file and check the migration status.
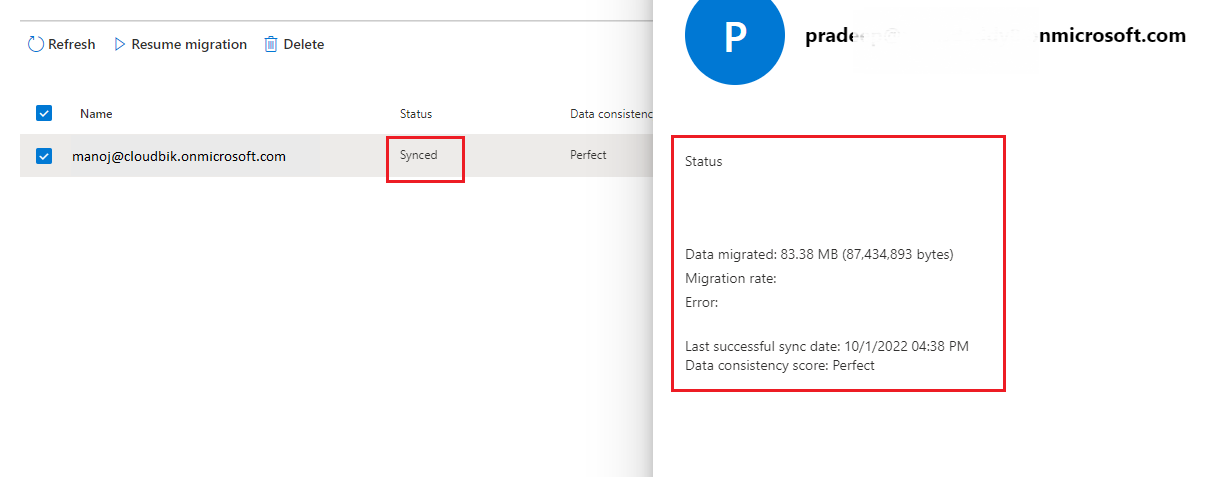
You have successfully migrated Gmail to Microsoft Office 365. In the steps above, I taught you how to migrate Gmail to Microsoft Office 365. I hope these steps have helped you.
Now let’s see the second method for migrating Gmail to Office 365.
2. Using MS Outlook (By configuring Gmail into MS Outlook to Export PST and Import that PST file into Office 365)
In this method, I will discuss how to migrate Gmail to Office 365 using MS Outlook. Let’s see the steps below for the complete process for Migration from Gmail to Office 365.
-
Configure your Gmail account in MS Outlook
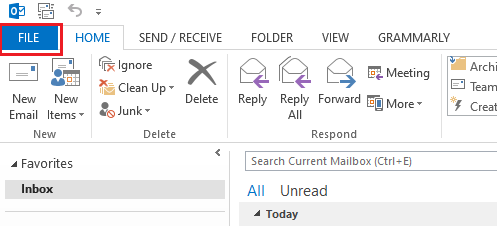
- Open MS Outlook and click on the file tab.
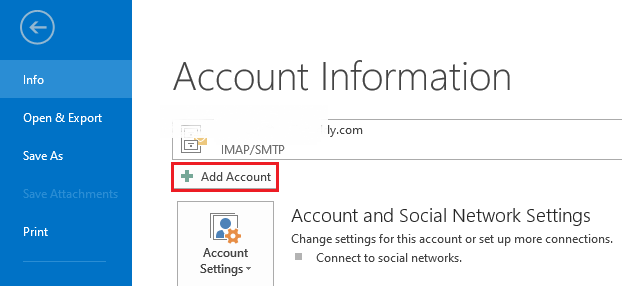
- Choose Add Account option.
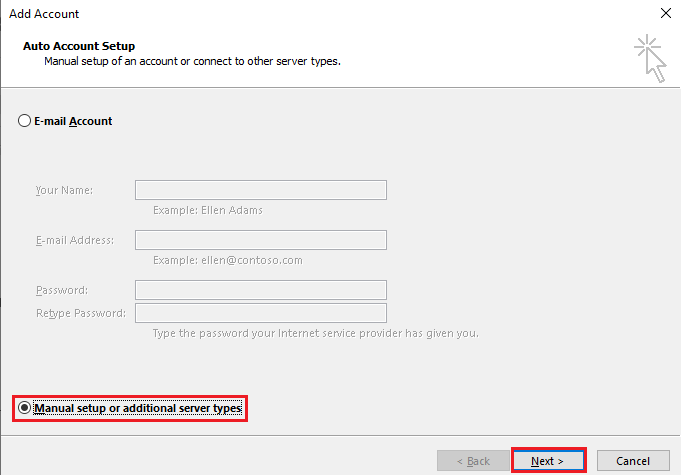
- An Add Account window will open; choose manual setup and click next.
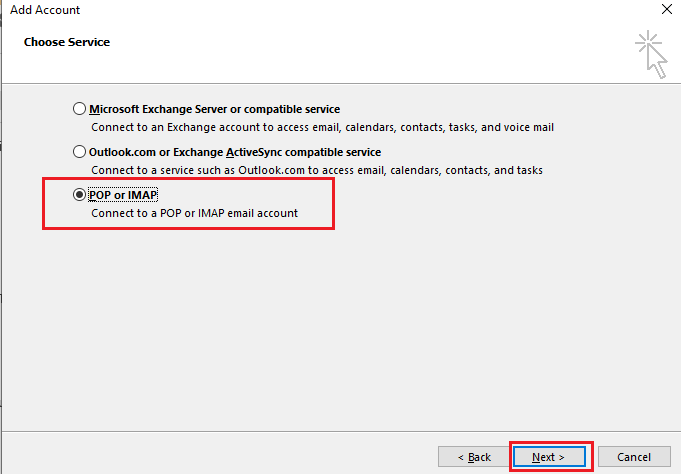
- Click on POP or IMAP and then next.
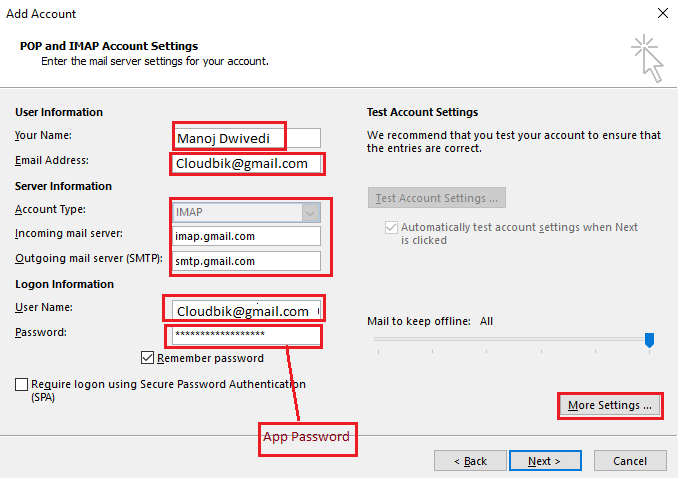
- Fill in all details as shown in the picture below and click on More Settings.
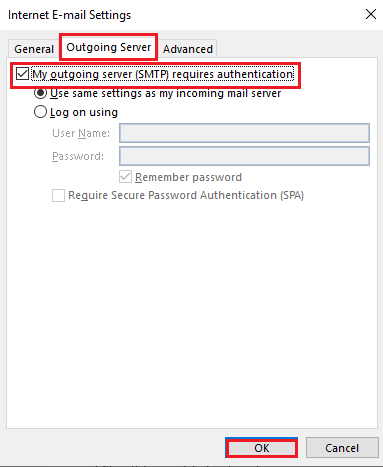
- Internet Emails Settings will open. Select the Outgoing server and choose the first option as enabled in the below image, and click on the advanced tab.
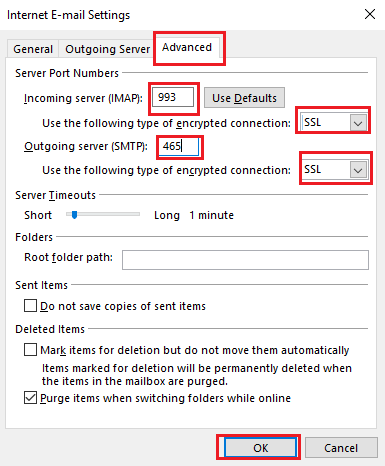
- In the advanced tab, fill in the details of the Incoming Server and Outgoing Server as in the picture below. Click ok after filling in these details.
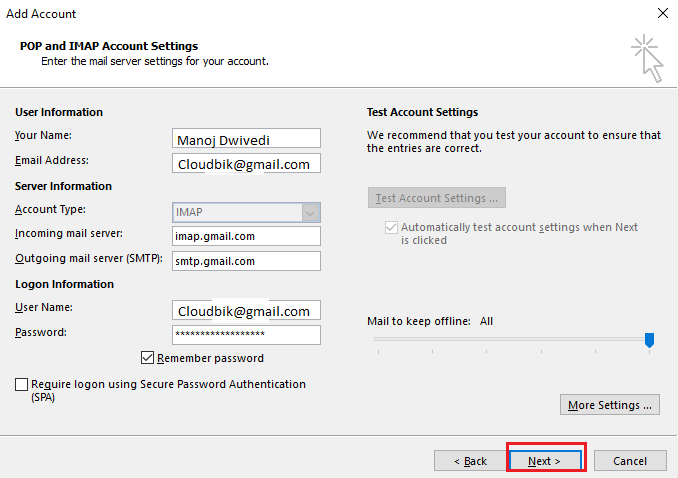
- Now it will take you back to add account option, click next to add your account.
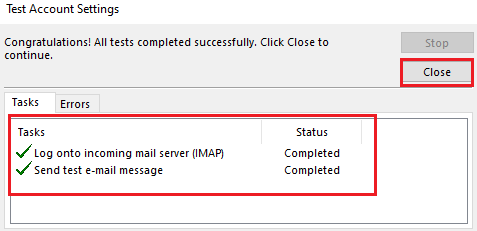
- It will test your account settings showing you the testing status. Click on Close after showing the completed status.
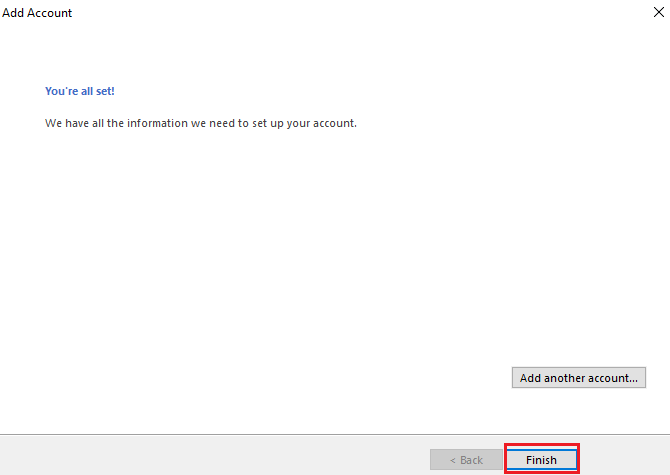
- Now a tab will open showing you are all set. Click on finish.
You have successfully configured your Gmail account into MS Outlook. Now you need a PST file for importing into Microsoft Office 365.
-
Export PST file from MS Outlook
- Click on the File Tab in MS Outlook.

- Click on Import/Export tab followed by Open & Export.
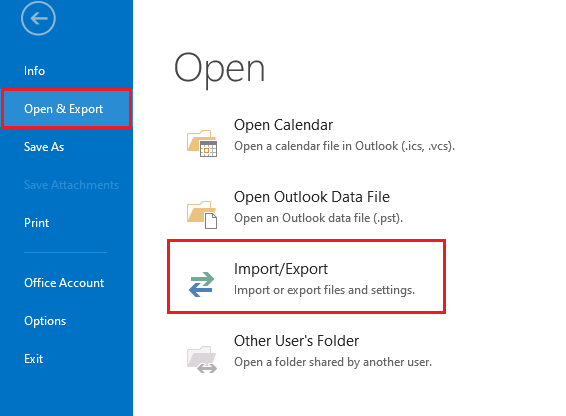
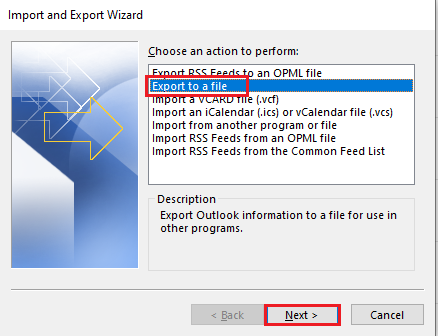
- Import and Export Wizard will open, choose export to a file and click next.
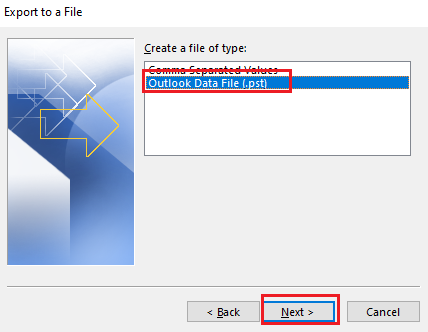
- In the next window, choose Outlook data file (.pst) and click next.
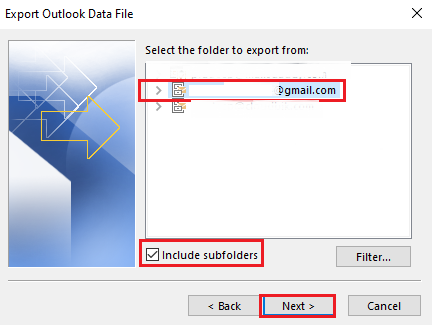
- Choose your account and click next.
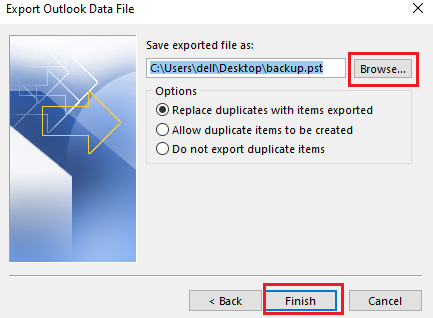
- Now choose a destination to save the PST file and click on finish.
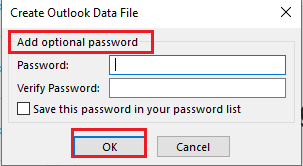
- In the next window, you can choose to add a password to your PST file if you need. (optional). Click ok to proceed further.
It will export the PST file to chosen destination. Through these steps, you have successfully exported the Outlook PST file. You must transfer the PST file into Office 365 to complete the Gmail to Office 365 migration.
-
Import Outlook PST into Office 365
You can import Outlook PST using two methods:
- Using Network Upload Method
- Using MS Outlook Import/Export Wizard
You can use any of these methods to import PST into Office 365. Please read this guide to learn how to import Outlook PST into Office 365. The steps above teach you step-by-step importing Outlook PST files into Office 365.
3. Using Third-Party Tools to Migrate Gmail to Office 365
You can use any third-party application for migrating Gmail to Office 365. It is the best method as it is effortless and requires no technical knowledge. A novice user can use these third-party applications without any difficulties. So, if you want hassle-free Migration of Gmail into Office 365, I suggest you use any third-party application.
Conclusion:
In this blog, I shared multiple methods to Migrate Gmail to Office 365. You can use any of these methods as per your feasibility. I hope this guide helped you solve your queries like Migrating Gmail to Office 365, Migrating Gmail to Office 365, PST to Office 365, and Migration of Gmail into Microsoft 365. Thanks for reading the complete guide.

