Zoho Mail is like Google Workspace providing business emails. It offers free emails like Gmail, also you can add your domain and can choose business email. It gives you free business emails for 5 users with some limitations. In this guide we will explore some benefits of moving to Zoho Workspace and process to migrate from Google Workspace to Zoho mail.
We will focus on the manual process using the native method that is completely secure and there is no risk of data loss.
Why Choose Zoho Mail?
Zoho Mail offers a robust and feature-rich email platform that caters to businesses of all sizes. With powerful spam filters, extensive integrations, and a user-friendly interface, Zoho Mail is an excellent alternative to Google Workspace. Here are some key benefits:
- Enhanced Security: Advanced encryption and security measures ensure your data remains safe.
- Affordable Plans: Zoho Mail provides competitive pricing with flexible plans suitable for various business needs.
- Seamless Integration: Integrates smoothly with other Zoho applications and popular third-party apps.
- Ad-Free Experience: Enjoy a clean, ad-free interface.
Migrate from Google Workspace to Zoho Mail
Whenever we migrate data from any platform, it is very important to plan carefully to avoid data loss and seamless migration.
Pre-Migration Preparation
Before initiating the migration process, it is very important to make the plan. Here are the essential steps to take:
- Backup Your Data: Ensure you have a complete backup of all your emails, contacts, and calendar events from Google Workspace.
- Notify Your Team: Inform your team about the upcoming migration and provide them with any necessary instructions.
- Create Zoho Mail Accounts: Set up Zoho Mail accounts for all users in your organization.
Fulfilling Pre-Requirements to Perform the Migration
Before starting the migration from Google Workspace to Zoho Mail, we need to fulfil the pre migration requirements. Please follow the below procedure:
Create Project, Service Account and Key
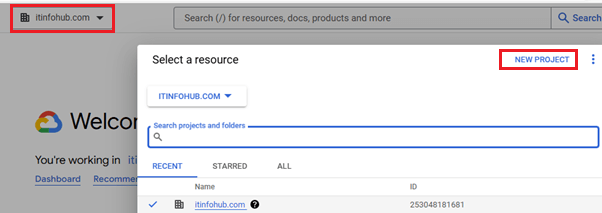
- Open cloud.google.com and click on organization name then choose new project.
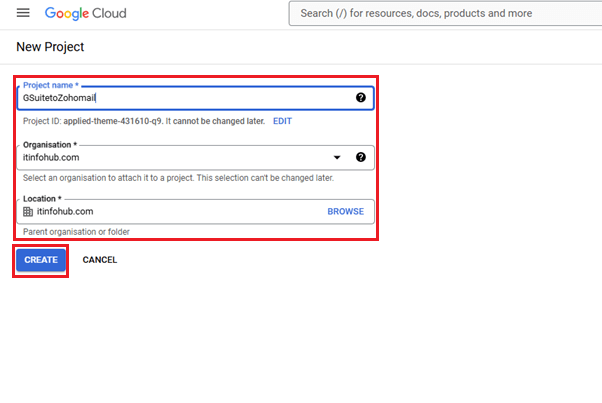
- Now provide project name, choose your organization and location. Once done click on the create
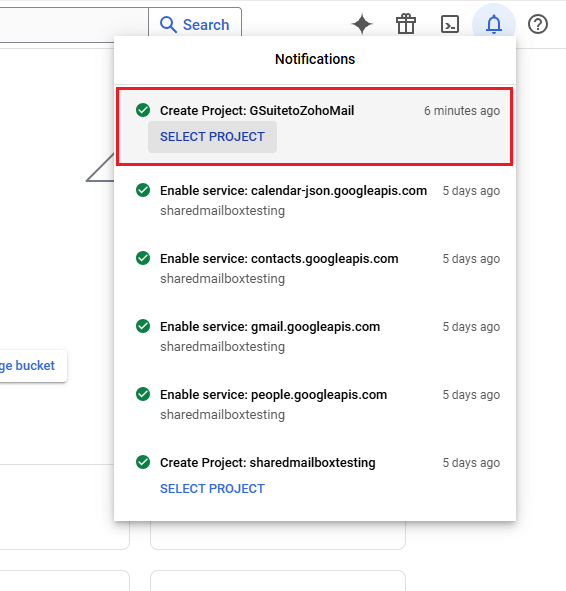
- A new notification will arrive, from here click on SELECT PROJECT.
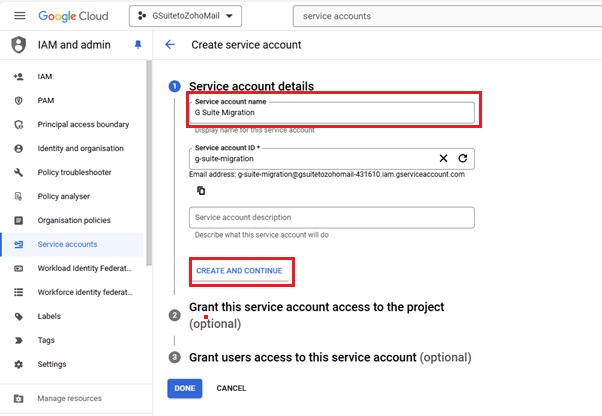
- In the search bar, search for service accounts and open it. In the service account window, click on the create service account.

- Now type service account a name and click on create and continue.
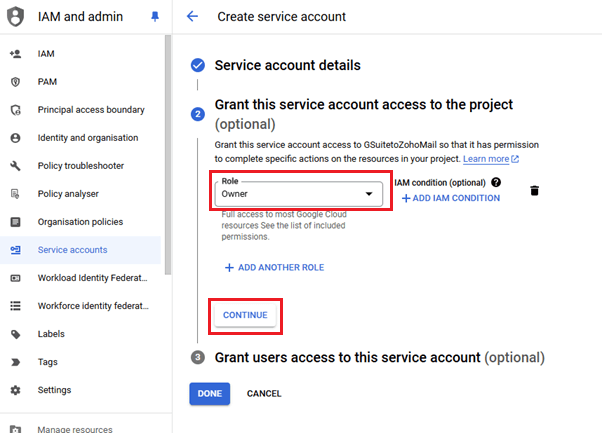
- In the service account access settings, choose Owner role and click on the continue
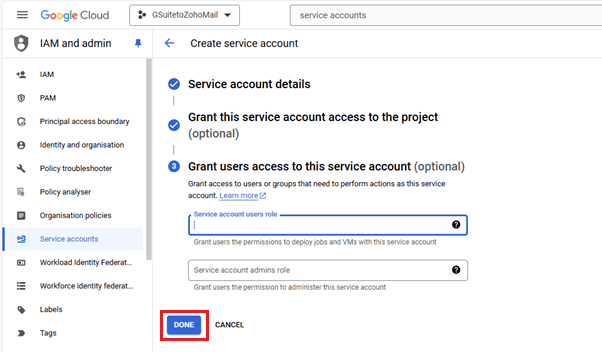
- In the grant user access settings, leave things blank and click on the done.
- Copy the email address and client id (also known as unique id). Save it in the safe place as it will be required later. Once done click on the service account for further steps.

- Now click on the keys, then add keys and choose P12 in the pop-up window and click on the Create.

- A file will be downloaded, save the file in the safe place.
Enable API Access
Now you need to enable access to some API. Please follow the steps mentioned below.
- Open the Google API Library.
Now locate and enable the below APIs for successful data migration.
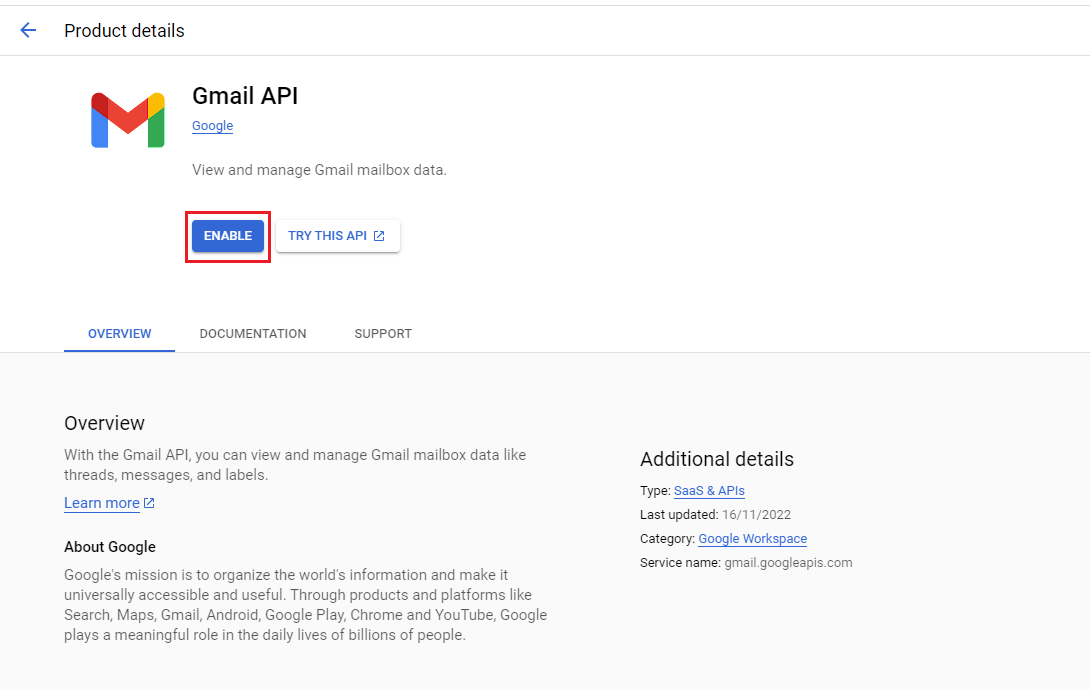
- Search for the Gmail API and click Enable.
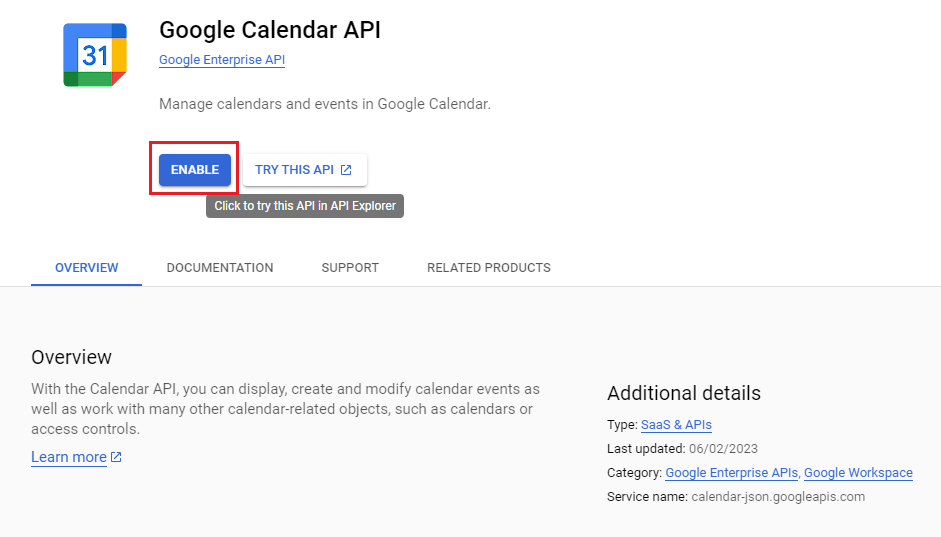
- Locate the Google Calendar API and click Enable.
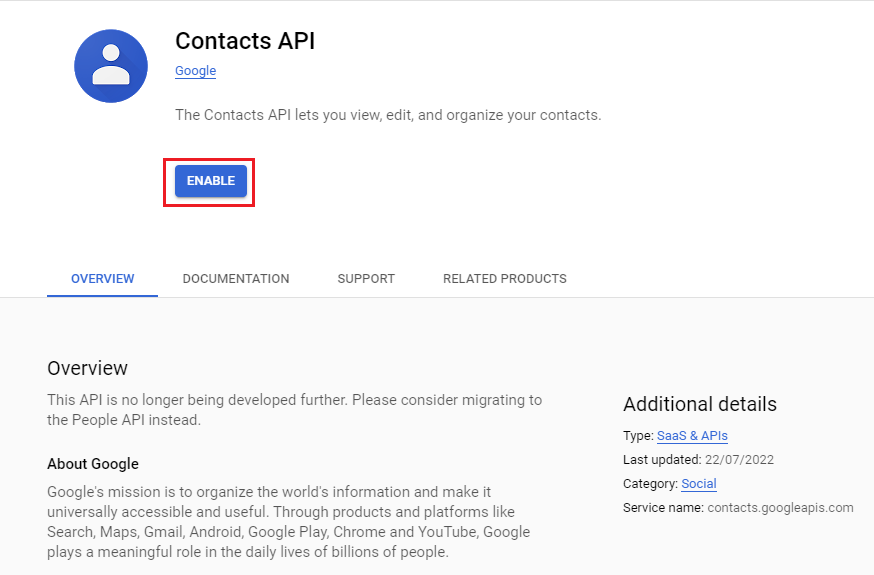
- Search for the Contacts API and click Enable.
- Search for the CalDAV API and click Enable.

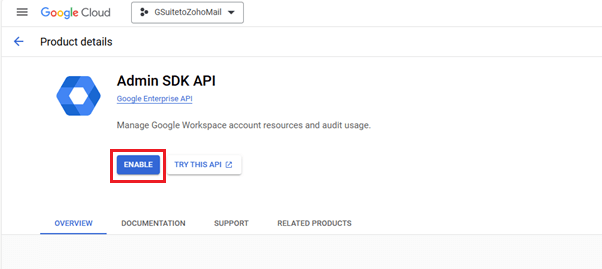
- Locate the Admin SDK and click Enable.
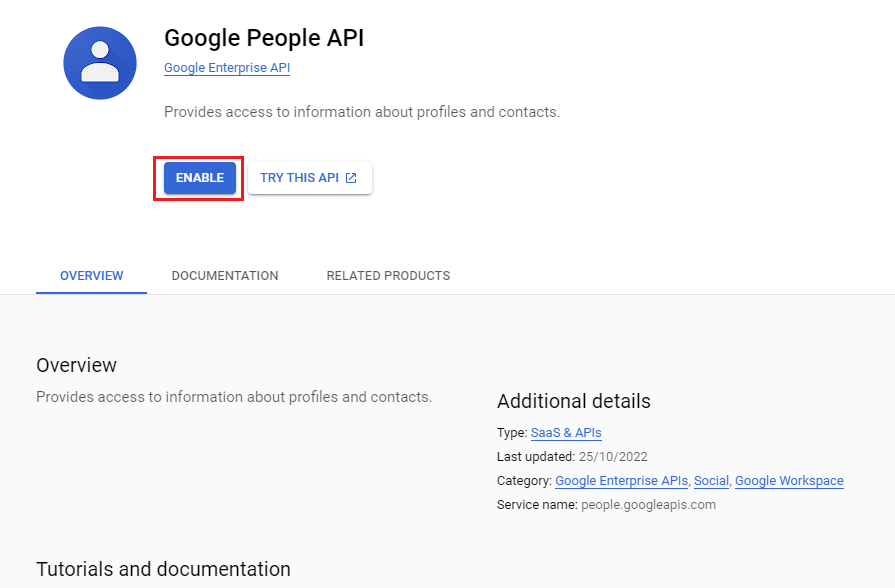
- Search for the Google People API and click Enable.
Add Domain Wide Delegation
Now we need to add domain wide delegation, for this we need to go to the Google Workspace Admin Panel.
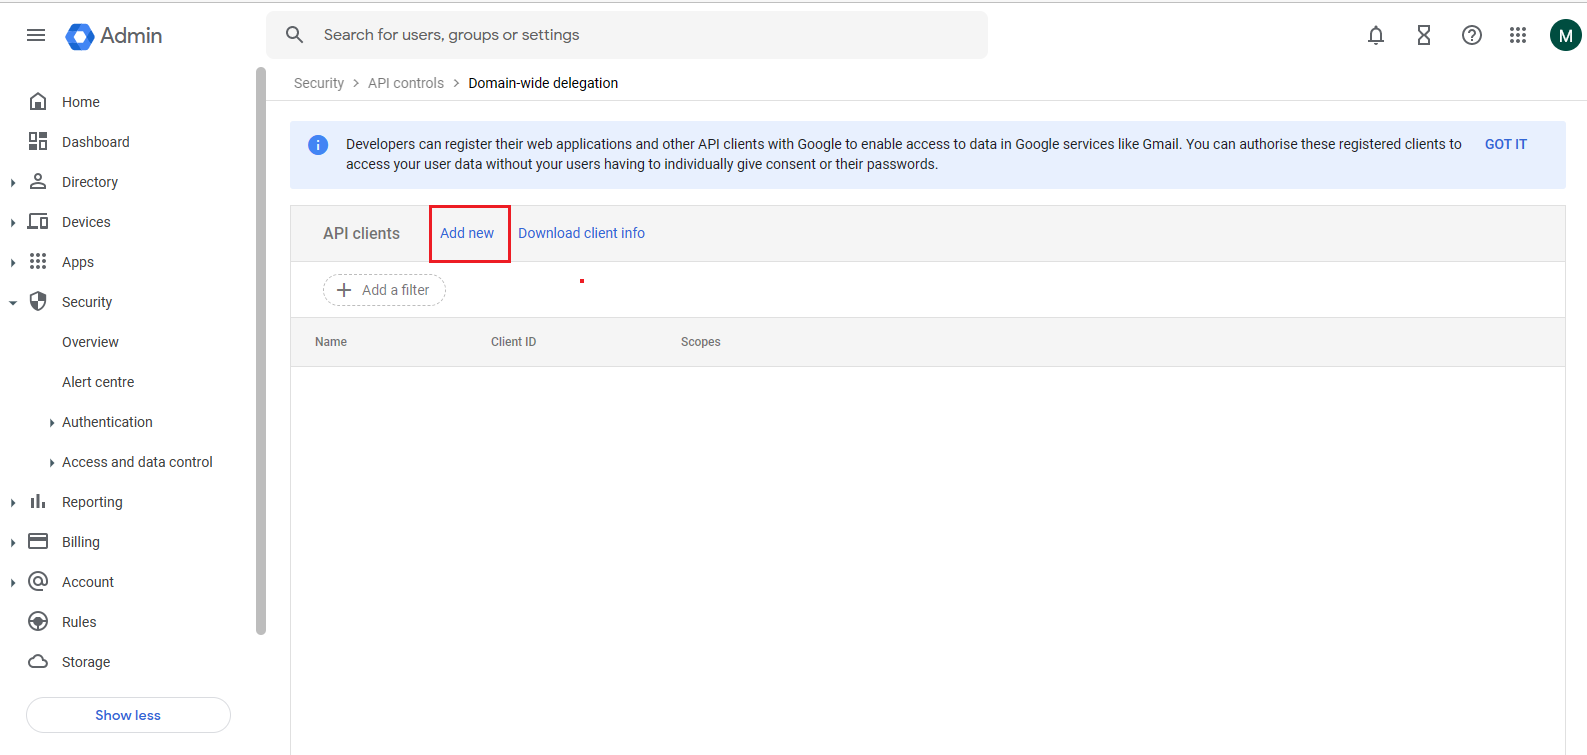
- Visit this direct link, https://admin.google.com/ac/owl/domainwidedelegation and click on add new.
- Now provide your client ID and add the scopes mentioned below and click on the authorize.
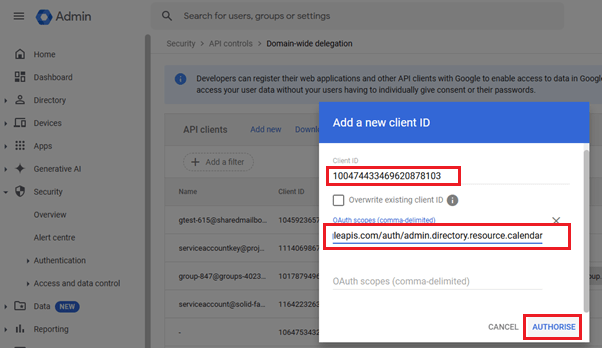
https://www.google.com/m8/feeds/contacts/default/full, https://www.google.com/m8/feeds, https://www.googleapis.com/auth/gmail.readonly, https://www.google.com/m8/feeds/groups/default/full, https://www.googleapis.com/auth/admin.directory.user.readonly, https://www.googleapis.com/auth/admin.directory.domain.readonly, https://www.googleapis.com/auth/admin.directory.group.member.readonly, https://www.googleapis.com/auth/admin.directory.group.readonly, https://www.googleapis.com/auth/calendar, https://www.googleapis.com/auth/admin.directory.resource.calendar
Once these pre-requirements are fulfilled, we can proceed with the migration procedure.
Data Migration from Google Workspace to Zoho Mail
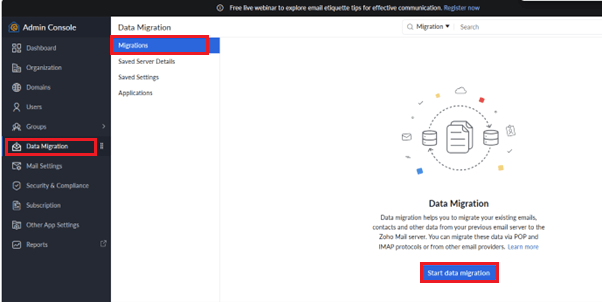
- First Open the Zoho Mail Admin panel and click on the data migration tab and the click on Start data migration.
- Provide all the details as shown in the picture below and click on the Authenticate button.
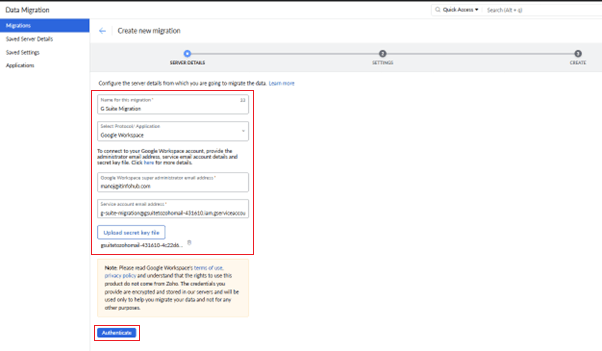
- Choose what app data and folders you want to migrate and click on the Add Button.

- In this screen leave things as it is and click on the Create.

- Now Go to the Users tab and click to add users or you can import users from CSV file.

- Provide email address of both source and target accounts and click on the add button.
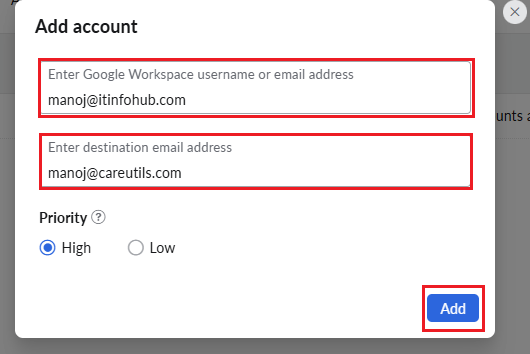
You can add more users those data you want to migration.
- Once user added, click on the Start Migration.
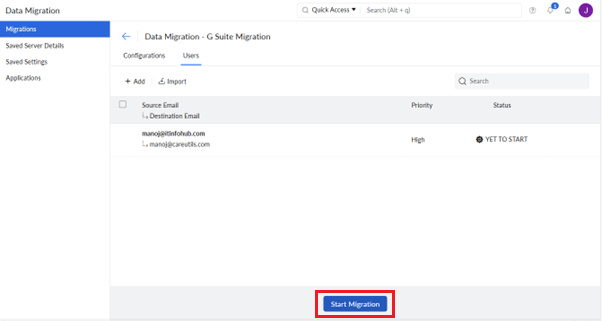
- Migration will start and show the status in the progress. Migration time will depend on the data size.
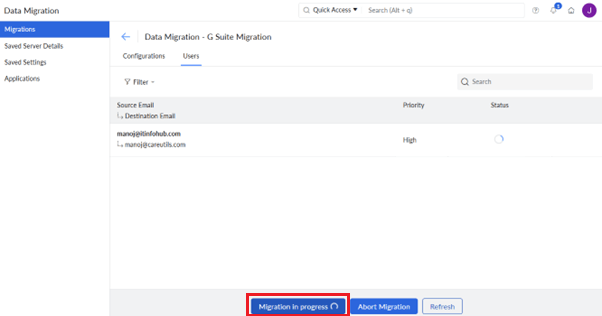
- Once completed, it will show you the status as completed.

With the above-mentioned steps, one can easily migrate from Google Workspace to Zoho Mail.
Tips for a Smooth Transition
- Test Before Full Migration: Consider performing a test migration with a small set of data to ensure everything works correctly.
- Utilize Zoho Support: Leverage Zoho’s customer support for any issues or questions during the migration process.
Conclusion
Migrating from Google Workspace to Zoho Mail is not a difficult task. It can be done easily with the help of the steps mentioned in this guide. Zoho mail is a better option if you want to use it for less than 5 emails as it offers free plan also. Feel free to ask any questions if you have. We will be happy to help you.

